Quickstart
Quickstart table of contents:
Requirements
Note
At this time, zamiaCAD+PyVHDL has been tested on Windows 7 and Windows 10.
- Java Runtime Environment version 1.8. Install the 64 bit version of the JRE.
- Stackless Python 2.7 choose the amd64 version.
Note
Be sure python.exe in on your path.
Install PyVHDL
Download PyVHDL-0.0.1.zip from GitHub here. Extract the contents of the zip file to a location of your choice. I use C:/Projects/PyVHDL
zamiaCAD
As noted above, PyVHDL runs alongside the zamiaCAD Eclipse IDE. zamiaCAD provides an environment for creating VHDL design projects, editing VHDL files, analyzing and elaborating a VHDL design, controlling a simulation, and displaying waveform files generated by a simulation. If you have used the Eclipse framework before, you will feel fairly at home using zamiaCAD. zamiaCAD has many features that facilitate working with VHDL designs. Read this zamiaCAD tutorial to learn more about zamiaCAD`s features.
Zamiacad is split into an IDE component, and a VHDL processing component. It is possible to run simulations without the IDE in command line mode using just the VHDL processing component.
Initial zamiaCAD setup
Navigate to the PyVHDL-0.0.1 directory. Double click on run_giu.bat. The zamiaCAD+PyVHDL splash screen should appear:
zamiaCAD+PyVHDL Splash Screen
Next a Workspace Launcher dialog should appear. Accept the default workspace that appears in the Workspace textbox. It should be a folder named workspace in the PyVHDL installation folder:
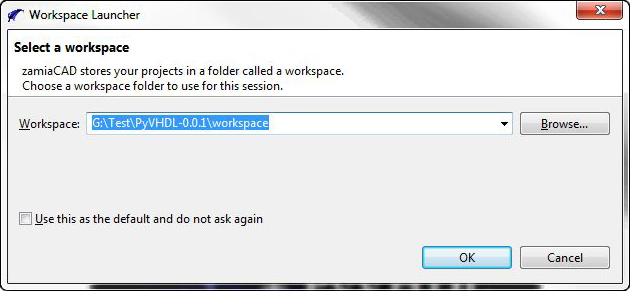
Workspace Launcher Dialog
Click on the Use this as the default and do not ask again checkbox, then click on OK. The initial zamiaCAD+PyVHDL IDE should appear.
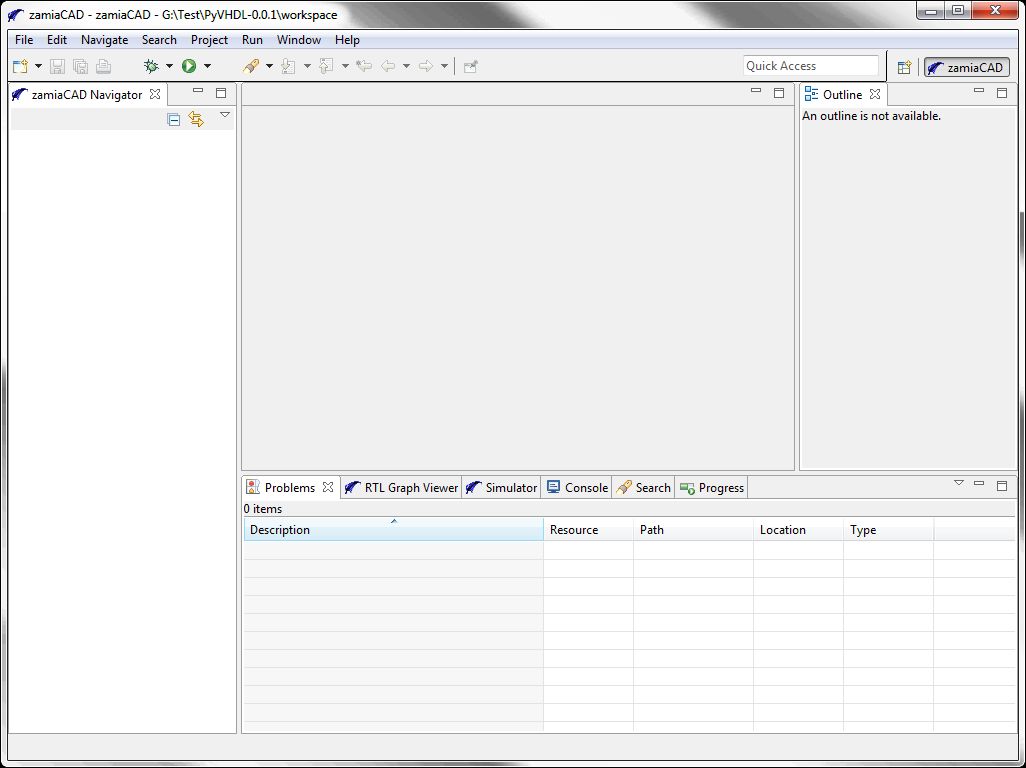
Initial zamiaCAD+PyVHDL IDE
Run the plasma demo
The plasma demo is a zamiaCAD+PyVHDL project for simulating the plasma CPU design. Plasma is a 32-bit MIPs compatible processor. The design is a set of RTL style VHDL files.
Setup a new project
Before the plasma project can be simulated, a new project must be setup in the zamiaCAD Navigator view. Make sure the zamiaCAD perspective is active. It should appear highlighted in the upper right corner of the IDE window. On the top menu select File > New > zamiacad Project. The Create New zamiaCAD Project dialog will appear.
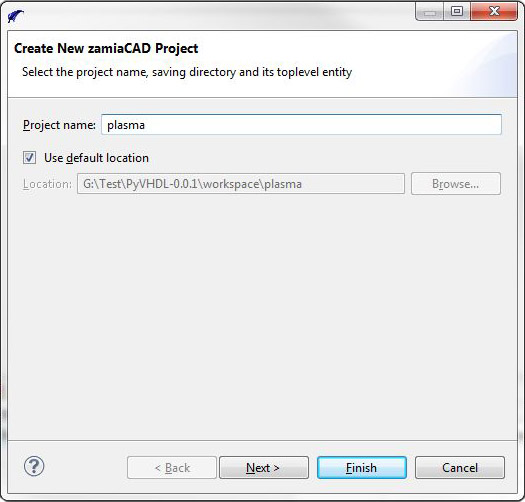
Create New zamiaCAD Project Dialog
In the Project name textbox enter plasma. Click Finish. A Do Full Build? dialog will appear. Click No. A project folder labled plasma will now appear in the IDE zamiaCAD Navigator view.
Import the archived project
The zamiaCAD+PyVHDL IDE allows projects to be archived, and later imported back into the IDE workspace. The folder at PyVHDL-0.0.1/share/saved-projects contains the plasma project archived as plasma-PyVHDL.zip.
Make sure the plasma project is highlighted in the IDE zamiaCAD Navigator view. Right click on the plasma project folder. In the context menu that appears select Import.... The Import dialog will appear. Double click on the General folder, and select Archive File, then click the Next > button.
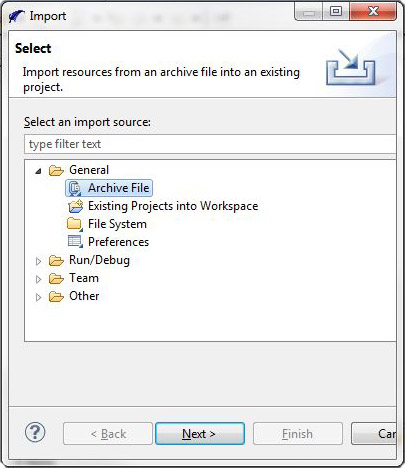
Import Dialog
Next a dialog appears where the import is setup. Click on the Browse... button to the right of the From archive file: text box. Navigate to PyVHDL-0.0.1/share/saved-projects . Select the plasma-PyVHDL.zip file. Click the Open button. Now the completed Import dialog should look like this:
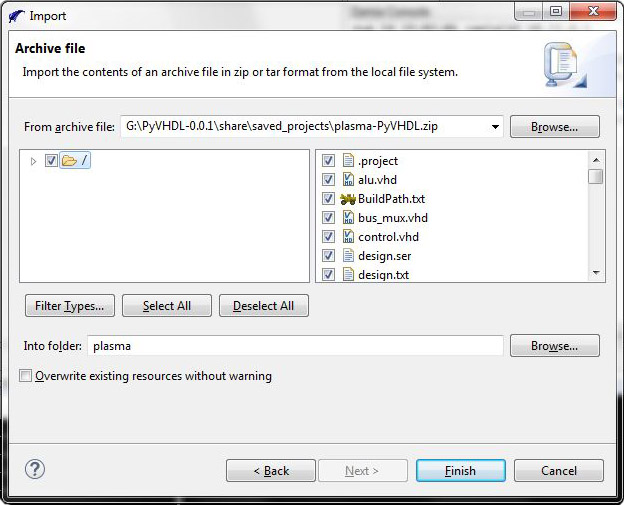
Completed Import Dialog
Click on the Finish button. In the Question dialogs that appears, click the Yes button. In the Do Full Build? dialog, click Yes. zamiaCAD will analyze and elaborate the plasma design. A log of that process will be in the Zamia Console window. Click on the plasma project folder. The project navigation information will appear below the folder. The red and blue rectangular icons can be opened to view the project design hierarchy. The files that make up the project are listed below the icons. You are now ready to setup and run a PyVHDL simulation.
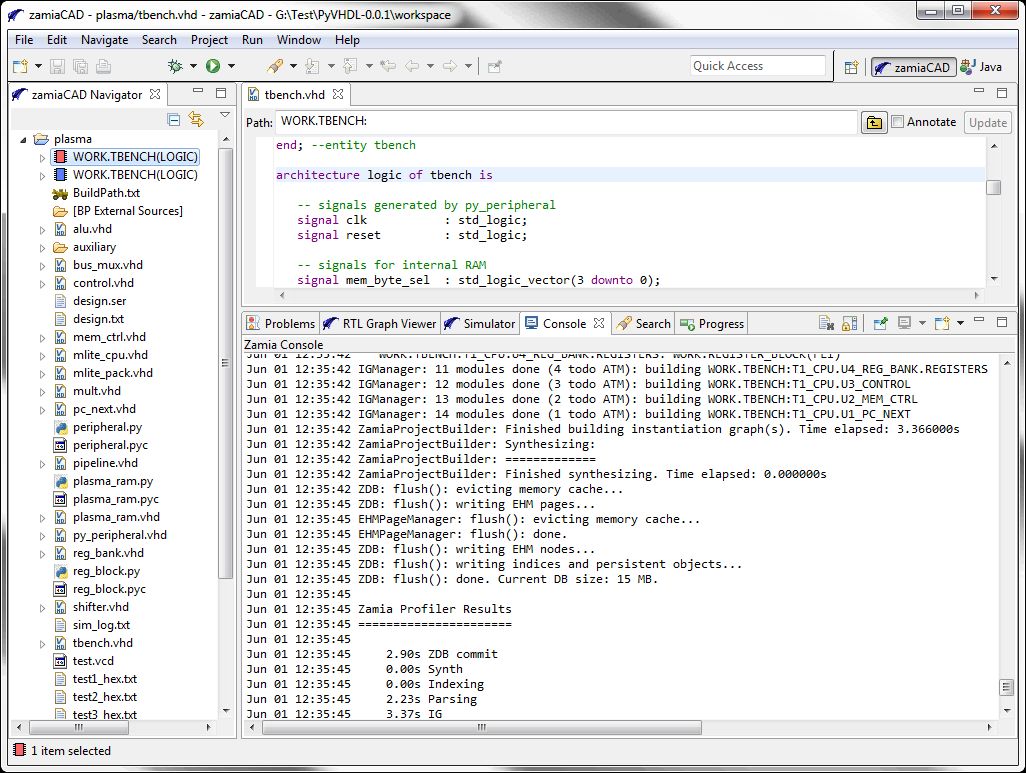
The IDE After Plasma Project is Built
Configure a simulation
Make sure the plasma project is highlighted. On the IDE menu click Run > Run Configurations.... The Run Configurations dialog appears. Right click on zamiaCAD Simulation, and select New.
The right side of the dialog now displays the settings for the new configuration.
- In the Name: text box type
plasma PyVHDL.- Click the Browse... button next to the Project text box. Select the plasma project folder, and click OK.
- Click on the Simulator: dropdown, and select Python Simulator.
- Click on the Browse... button next to the Toplevel: textbox. TOPLEVEL WORK.TESTBENCH should be highlighted. Click OK.
- Click the Browse... button next to the Flle: textbox. Navigate to the PyVHDL-0.0.1\workspace\plasma folder. Select the test.vcd file. Click the Open button.
- The Signal path prefix: textbox should be empty.
Check that the fields in the Run Configurations dialog match the figure below:
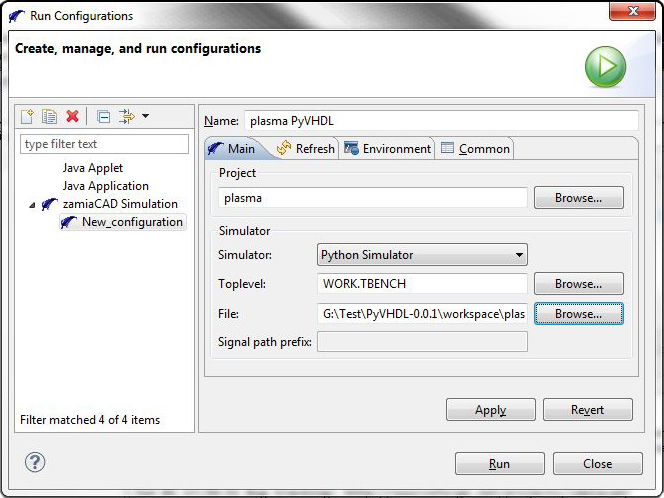
Completed Run Configurations Dialog
Run the simulation
Click the Run button. If a Do Full Build ? dialog appears, click Yes. Open the Zamia Console window if it is not open. The text at the bottom of the console window will look similar to this, without the coloring:
Jun 03 18:00:47 >>> RD_DATA1 00000000 fr zero @ 33325.00
Jun 03 18:00:47 **** MEMORY READ: value 0x00000000, address 0x000003A8 @ 33325.00
Jun 03 18:00:47 **** MEMORY READ: value 0x080000E9, address 0x000003A4 @ 33375.00
Jun 03 18:00:47 **** MEMORY READ: value 0x00000000, address 0x000003A8 @ 33425.00
Jun 03 18:00:47 **** MEMORY READ: value 0x080000E9, address 0x000003A4 @ 33475.00
Jun 03 18:00:47
Jun 03 18:00:47 Simulation done (StopEvent)
Jun 03 18:00:47
Jun 03 18:00:47 Elapsed time = 2.8060
Jun 03 18:00:47 Simulation time = 33500.00 ns
Jun 03 18:00:47
Jun 03 18:00:47
Jun 03 18:00:47 Zamia Profiler Results
Jun 03 18:00:47 ======================
Jun 03 18:00:47
Jun 03 18:00:47     2.71s ZDB commit
Jun 03 18:00:47     0.00s Synth
Jun 03 18:00:47     0.03s Indexing
Jun 03 18:00:47     2.24s Parsing
Jun 03 18:00:47     3.42s IG
Make sure the Simulator window is visible. The IDE will look similar to this:
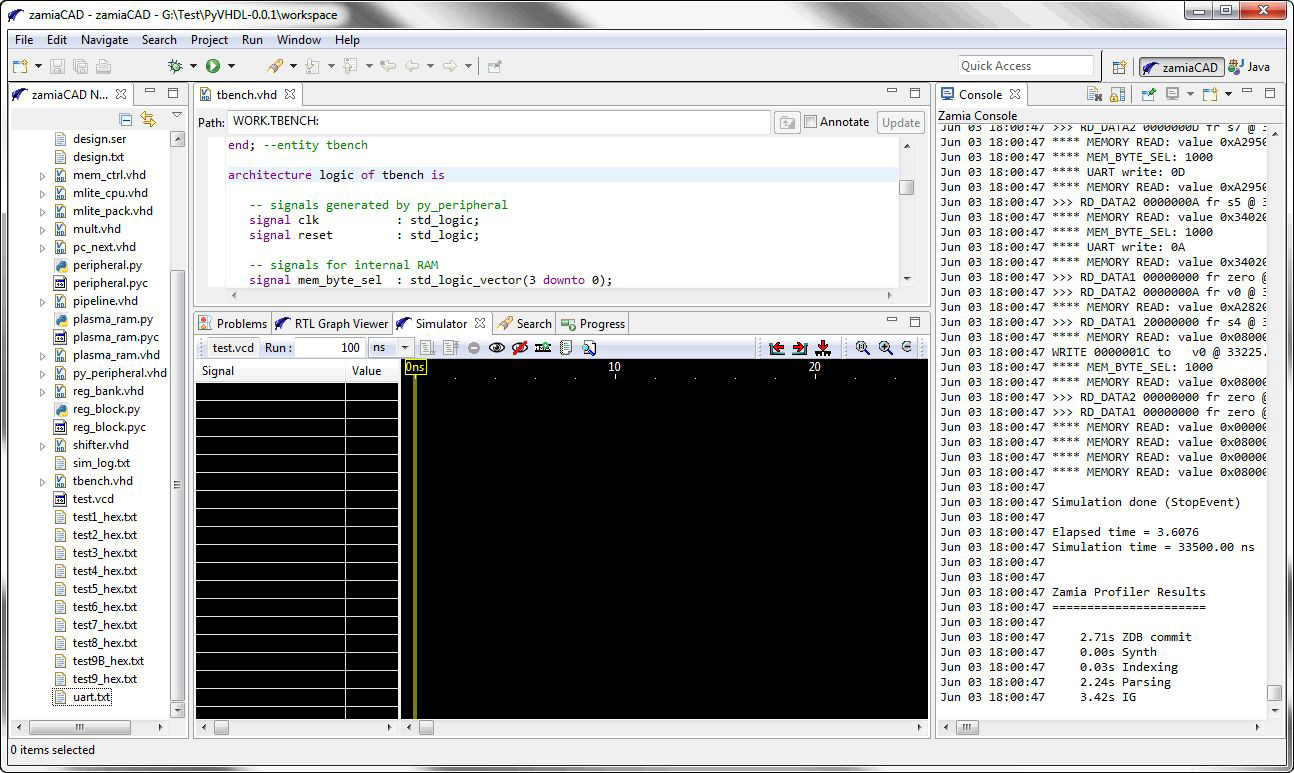
IDE After Simulation Run
To select the signal waveforms to be displayed in the Simulator window, click on the Eye icon on the Simulator menu. The Select signals to trace dialog appears. In the Select signals to be traced textbox enter *. A list of signals will appear. Select all the signals. Click OK. The names and waveforms of the signals will now appear:
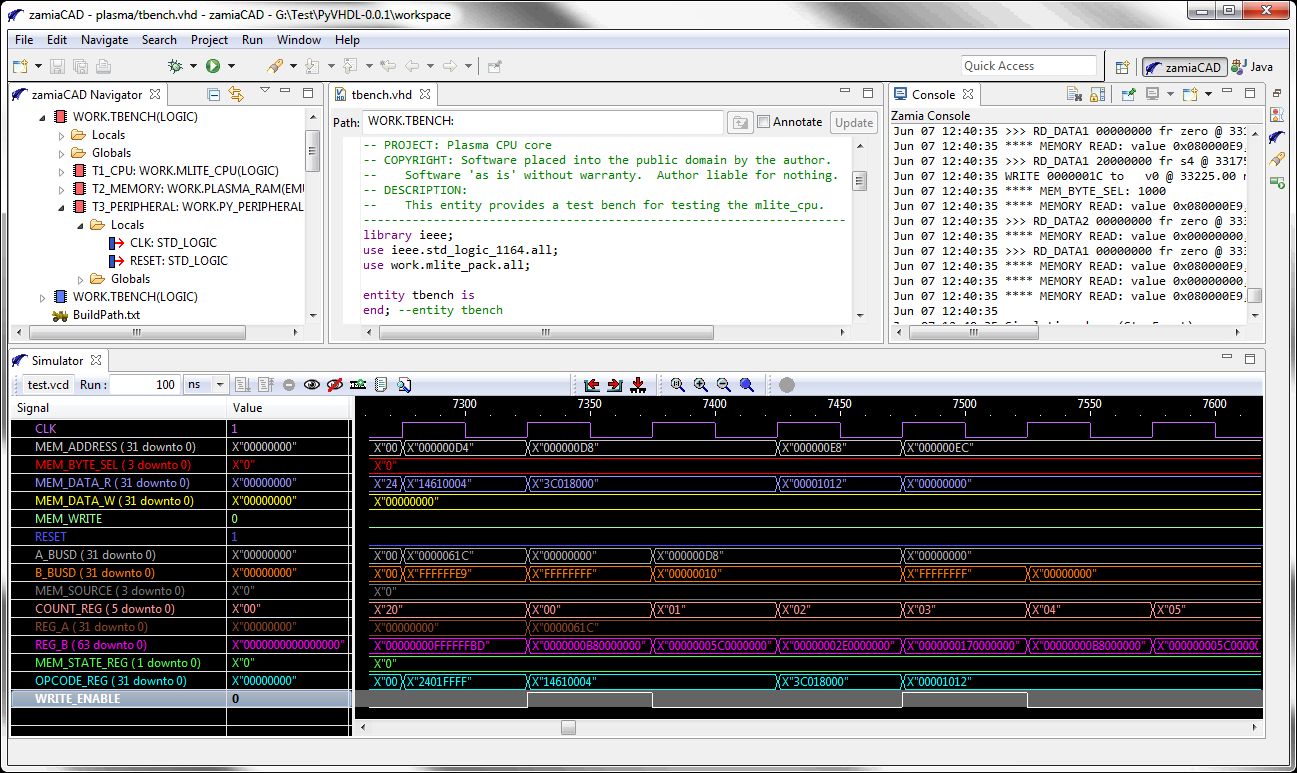
IDE Displaying Waveforms
The IDE windows can be resized to show more of the waveforms. You can click on the Simulator window magnifying glass menu icons to zoom in, zoom out, or zoom full.
This completes the zamiaCAD+PyVHDL Quickstart tutorial. Read this zamiaCAD tutorial to learn more about the very useful features of the IDE.